Opticline Series Optical Measuring Systems: For Use in Automation
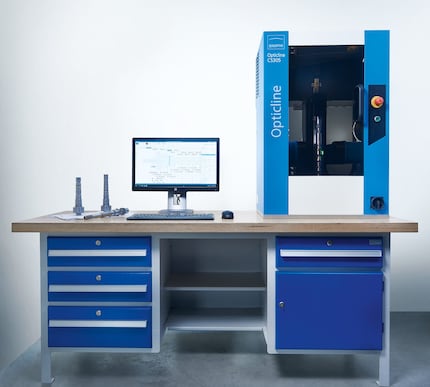
The Opticline CA, AMV, and WMS series optical measuring systems meet the high demands of automation. They deliver precise measured data on your workpieces with repeat accuracy.
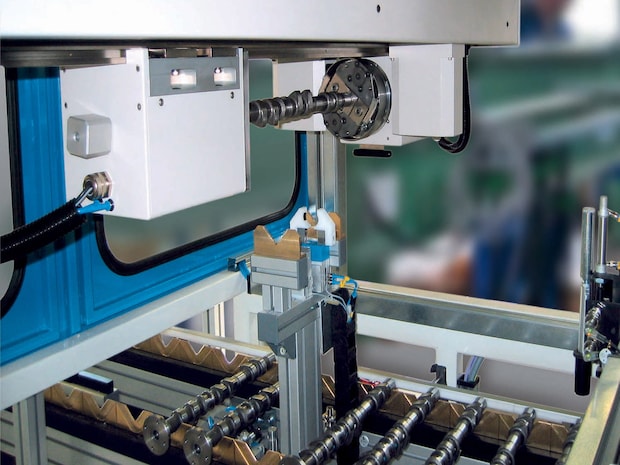
Opticline Automation Process
Jenoptik designed the Opticline CA, AMV, and WMS series optical measuring systems specifically for automation. With intelligent hardware and software interfaces, they can be integrated flexiblyand seamlessly into your automated production processes. Our systems deliver high-precision and reliablemeasurement results – even after long-term operation in a tough production environment.
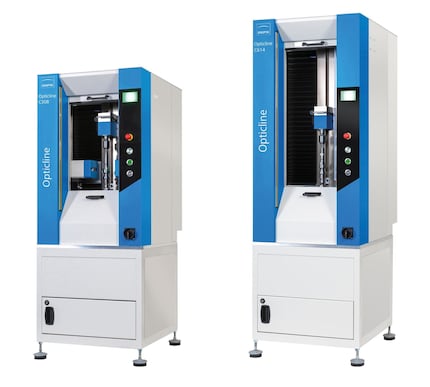
The shaft measuring systems have impressive measurement cycle of just seconds. This means you can efficiently monitor production, and generate less waste. The systems come in various designs so that they can be loaded either horizontally or vertically. We also offer special measuring system for particularly large and heavy shafts. If necessary, we can tailor our systems to your exact requirements.
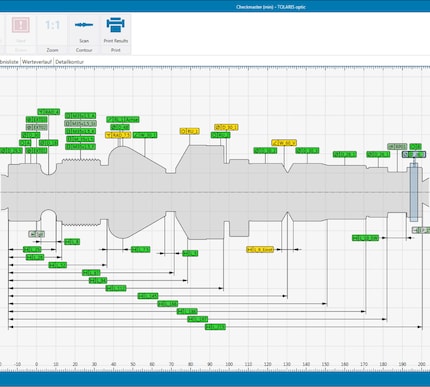
Our measurement and evaluation software offers comprehensive functions with additional options for correction value control, and can be effortlessly integrated in the manufacturing process. The program is easy to understand and simple to operate.
The Opticline CA series: optical systems for automated measurement
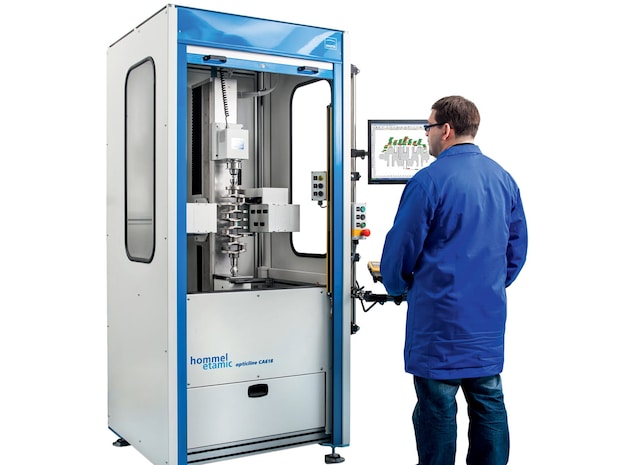
Opticline CA series
The measuring systems of the CA series are perfectly suited as SPC measuring stations, especially for use in automation. They are flexible, extremely robust and specially designed for permanent use in harsh production environments. They check dimension, form and position of your workpieces during production with extreme precision and reliability. Using the shadowgraph principle, they analyze a wide variety of shaft-shaped workpieces such as engine and transmission shafts, turbochargers, valves and pistons.
The optical measuring systems are characterized by non-contact measuring cycles within seconds. Intelligent hardware and software interfaces enable you to integrate the measuring systems of the CA series seamlessly and flexibly into your automated production processes. Depending on your requirements, you can choose from a wide range of different versions and designs.
The optical measuring systems are characterized by non-contact measuring cycles within seconds. Intelligent hardware and software interfaces enable you to integrate the measuring systems of the CA series seamlessly and flexibly into your automated production processes. Depending on your requirements, you can choose from a wide range of different versions and designs.
The Opticline AMV series: for concatenated use in production
The optical measuring systems of the AMV series have been specially developed for automated concatenation in production. They are extremely resistant and low-maintenance, and deliver precise measurement results with repeat accuracy in form and dimensions. Depending on your requirements, the shaft measuring systems can be arranged horizontally or vertically, for example to measure large workpieces such as crank shafts. The systems can be integrated easily and flexibly into your automated production processes.
The workpieces that can be tested with the AMV series have a maximum length of 900 mm, and a diameter of up to 230 mm. The measuring times are very quick – even with complex workpiece geometries.
The workpieces that can be tested with the AMV series have a maximum length of 900 mm, and a diameter of up to 230 mm. The measuring times are very quick – even with complex workpiece geometries.
The Opticline WMS series: optical measuring systems for particularly large and heavy workpieces
The optical measuring systems of the Opticline WMS series are designed for particularly large and heavy workpieces. Depending on the variant, they can handle weights of up to 250kg with diameters of up to 480mm. Maximum lengths are up to 2,500mm. These are the only machines on the market that can handle such dimensions, allowing particularly large and heavy workpieces such as crank shafts and gear shafts to be analyzed.
The shaft measuring systems can be used as an SPC measuring station, or if necessary, they can be integrated into the automated production run via intelligent hardware and software interfaces. The systems come in various designs so that they can be loaded either horizontally or vertically. They are extremely robust, and are ideal for continuous precision measurements in tough production environments.
The WMS series machines impress with their flexibility and high measuring accuracy across the entire measuring range. This is ensured by a cascading camera system that can deliver bi-directional probing of up to the maximum diameters without any losses in performance or resolution. The WMS measuring systems also ensure that measurements take just seconds, even with very large workpieces, allowing you to optimum and efficient monitoring of the production process.
Customer-specific optical measuring systems for use in automation
We are happy to assist you with complex measuring tasks. You will also benefit from our years of experience and our broad range of expertise. The optical measuring systems of the Opticline range are so flexible they can be used for a wide range of workpieces and measuring tasks. The measurement runs can also be perfectly intertwined. This ensures maximum quality, and saves you time and costs.
Application example
Valves present particular challenges when it comes to shaft measurement technology because they do not have any centering holes for concentric workpiece support. For this reason, Jenoptik has developed vacuum device. This offers secure workpiece support for valves, which means they are not covered by a clamping device. The whole valve is measured in just seconds.Evaluation characteristics
- Diameters, lengths, radii
- Angles, valve seat angle
- Roundness, radial run-out, valve seat
Software and interfaces
The optical measuring systems were specifically designed for automated concatenation in production. They can be integrated easily and flexibly into your automated production processes. Various interfaces are available for connecting to production lines and handling systems– from digital I/O lines via a PLC through to Profibus for complex process connections.
With our intelligent software and interfaces, the measuring systems quickly correct one or several processing machines to ensure the most efficient production process possible, and to help avoid waste. An integrated PLC interface connects the measuring system with the overarching loading system.
With our intelligent software and interfaces, the measuring systems quickly correct one or several processing machines to ensure the most efficient production process possible, and to help avoid waste. An integrated PLC interface connects the measuring system with the overarching loading system.
Automated interfaces for
- Gantry
- Correction control (post process)
- Classification, signing
Possible machine arrangements
The design of the optical measuring systems ensures wide and easily accessible loading areas. Loading can be performed either horizontally or vertically. If required, we can design project-specific housings or enclosures.
Arrangement and loading options
- Vertical installation, loading with robots
- Horizontal installation, loading with portable gantries from above
- Horizontal hanging installation (above conveyor belt), loading with lift-off station
Download
Benefits
- Precise and fast: High measuring accuracy; no operator influence on results. The measuring systems can be integrated into the machining process.
- Ergonomic and safe: Automated loading possible; even heavy workpieces are easy to handle.
- Robust and virtually wear-free: Optimized for use in production.
- Efficient: Reduce waste and material consumption.
- Customer-specific: Horizontal and vertical system design possible, project-specific housings and enclosures, systems that can be customized according to your workpieces and measuring tasks.
- Easy to understand operating software: Minimal training requirements and intuitive operation.
Applications
- Automotive industry: Measurement of turbochargers, engine valves, pistons, camshafts and crank shafts, gear shafts and drive shafts.
- Turned and ground parts producers: Measure shaft-shaped, largely axially symmetrical workpieces.
- Medical technology: Measure implants, bone screws, and rotating instruments.
Product views
Product recommendations
Please contact our experts for advice!


Metrology
+49 7721 6813-288
HOMMEL ETAMIC - JENOPTIK Automotive North America LLC


